In the ever-evolving world of Throne and Liberty, where combat and conquest often take center stage, the game's Codex quests offer a refreshing cerebral counterpoint. Among these, the Demon's Test stands out as a formidable mental gauntlet, a puzzle box hidden in the desolate Manawastes northeast of Sanctuary Oasis. While the area is typically recommended for adventurers around level 44 or 45, this particular challenge beckons the clever-minded, daring them to prove their wits can triumph where brute force is irrelevant. It's a quest that doesn't ask you to slay a beast, but to outthink its creator—a task many find as daunting as facing a raid boss unprepared.
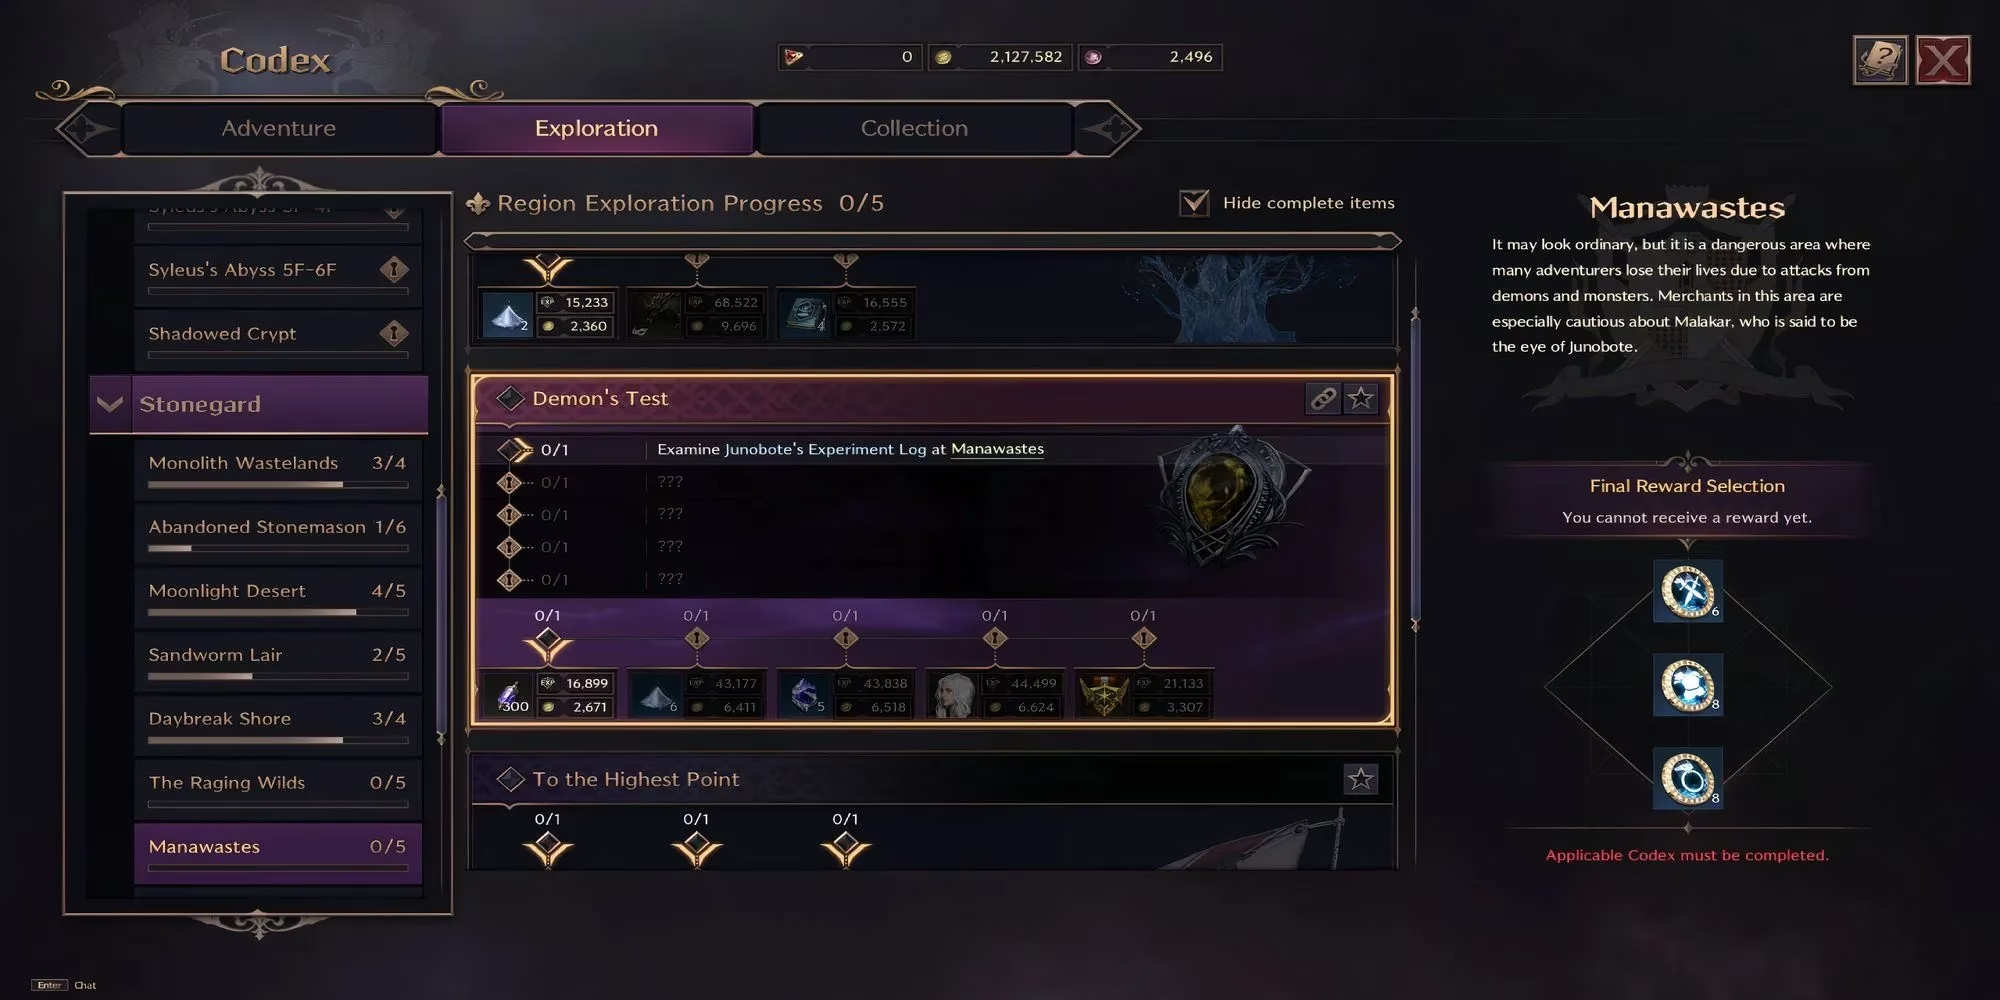
To embark on this journey, players must first locate Junobote's Experiment Log, perched on a lonely pedestal in the Manawastes, west of the local Waystone. Reaching it requires a bit of parkour, scaling a nearby rock to drop down into the secluded, arena-like spot. Interacting with the log is like inserting a key into a long-forgotten lock; it triggers a dialogue with the enigmatic Junobote and whisks the player away to a separate, testing realm. The quest then unfolds across five distinct objectives:
-
Examine Junobote's Experiment Log at Manawastes.
-
Pass the first test by Junobote.
-
Pass the second test by Junobote.
-
Pass the third test by Junobote.
-
Acquire the reward left behind by Junobote.
🧩 The First Test: A Shadowy Conundrum
The initial challenge is a riddle wrapped in a shadow puzzle. Junobote presents a cryptic description, and the player must manipulate three statues on turntables to cast a specific silhouette. The answer to the riddle is a unicorn. The three statues depict a horse, an eagle, and a sword. Solving this is like assembling a fractured ghost from disparate memories. Here's the precise method:
-
Horse Statue: Rotate until its shadow faces left. This forms the core body.
-
Eagle Statue: Adjust so only its wings are visible, connecting them to the horse's back.
-
Sword Statue: Turn until its shadow extends from the horse's head like a horn.
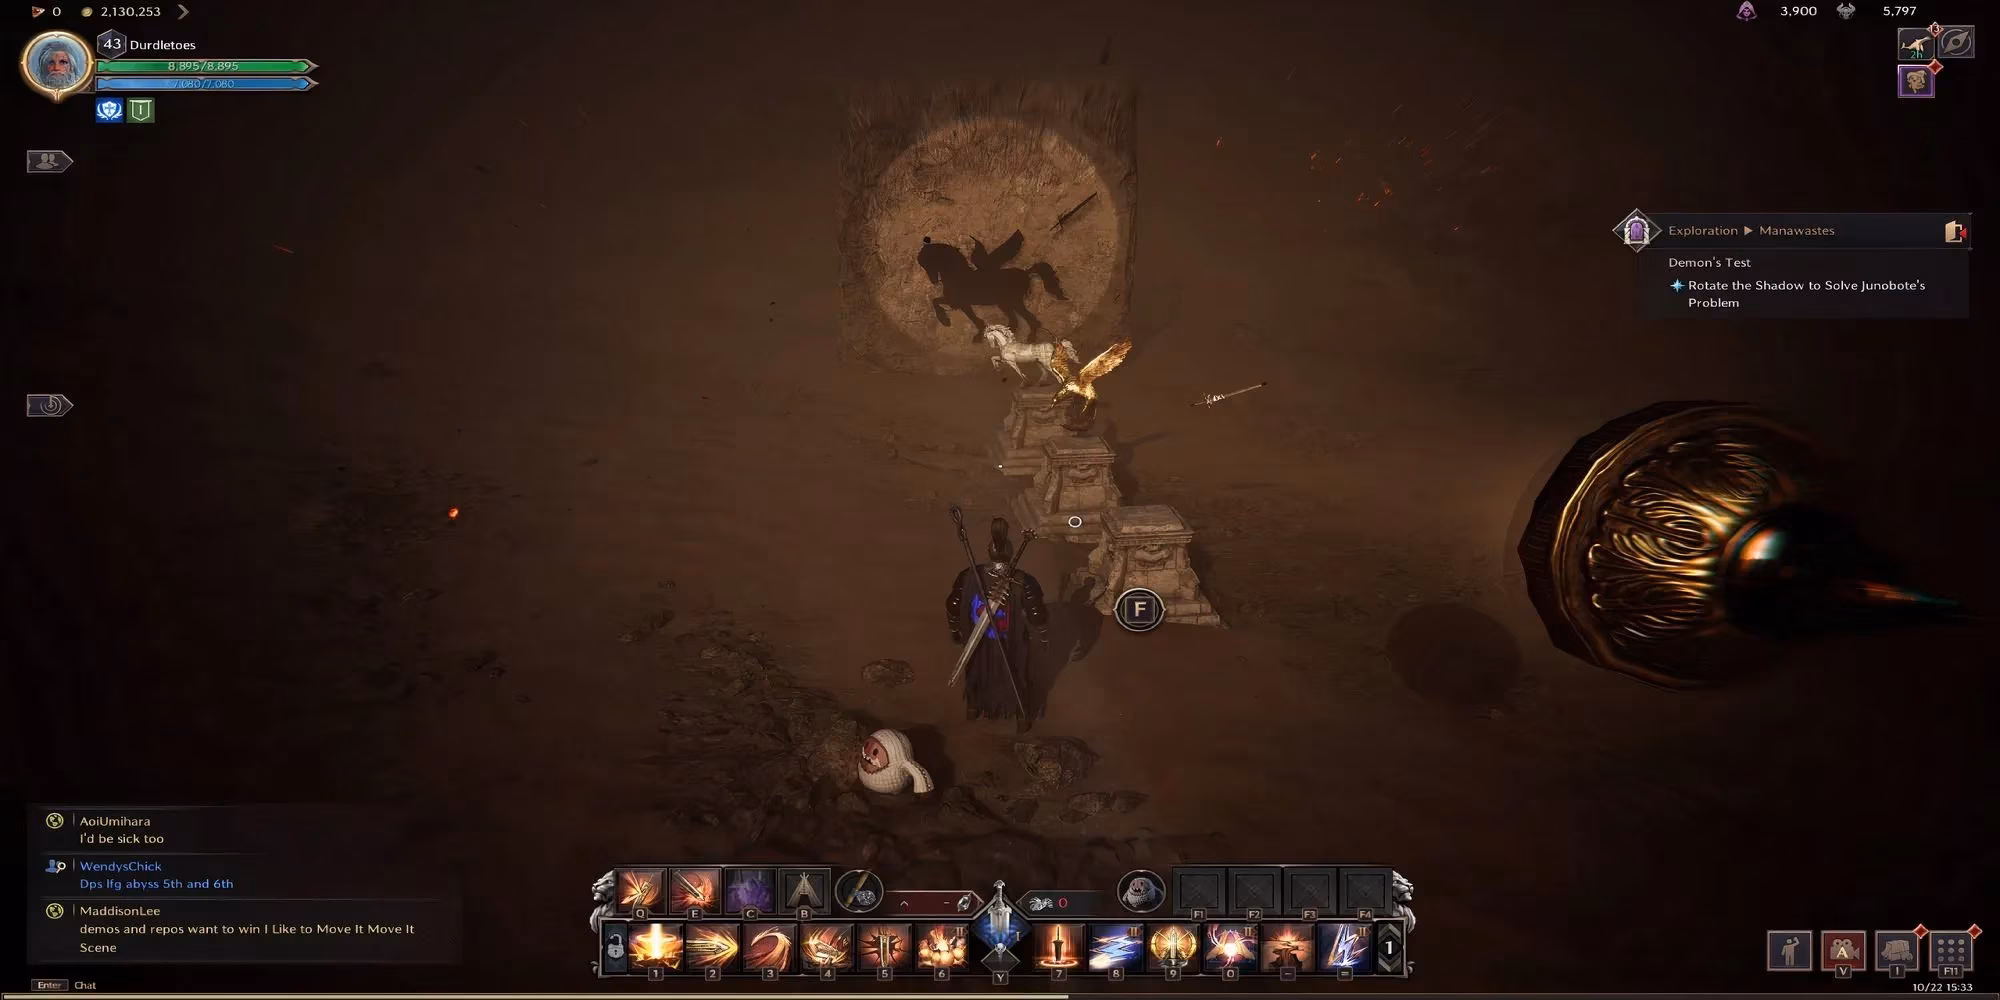
Correct alignment summons a teleportation circle, advancing the test.
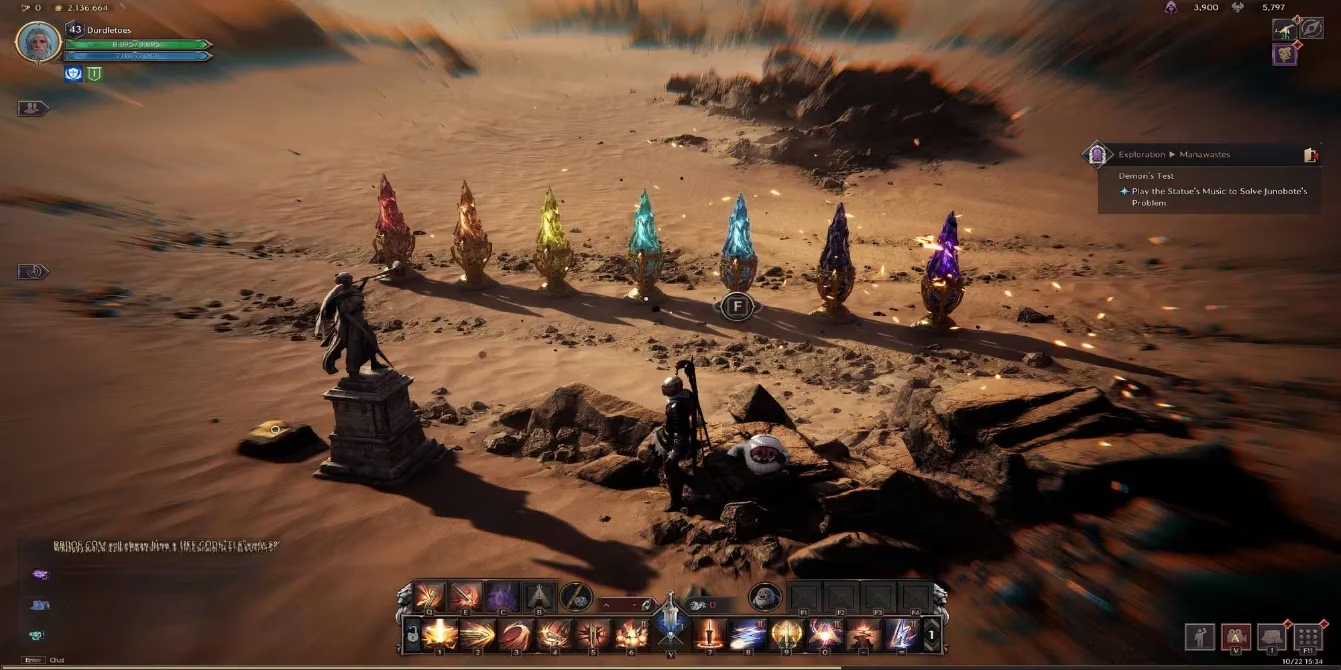
🎵 The Second Test: A Symphony of Crystals
This puzzle elevates the difficulty, trading spatial reasoning for memory and rhythm. A central statue plays a sequence of musical notes, each accompanied by a colored symbol that corresponds to one of seven crystals arranged before it. The task is to replicate the sequence by striking the crystals in the exact order and timing. For many, this moment is as disorienting as trying to recall a dream's melody upon waking. To simplify, number the crystals 1 to 7 from left to right. The solution sequence is:
2, 5, 6, 4, 3, 1, 3, 2
Executing this melody perfectly will cause another teleport circle to materialize.
⚖️ The Third Test: Balancing the Golems
The final trial is the most complex, a logic puzzle involving five control crystals and a set of stone golems. Each crystal, when activated, raises or lowers specific golems in a pre-set pattern. The objective is to get all golems to stand at the same height, but the interconnectivity makes it a delicate balancing act—like trying to level a wobbly table by adjusting five interconnected legs. Number the crystals 1 to 5 from left to right. The correct activation order to achieve balance is:
2, 4, 3, 3, 5, 5

Success here triggers the final teleporter.
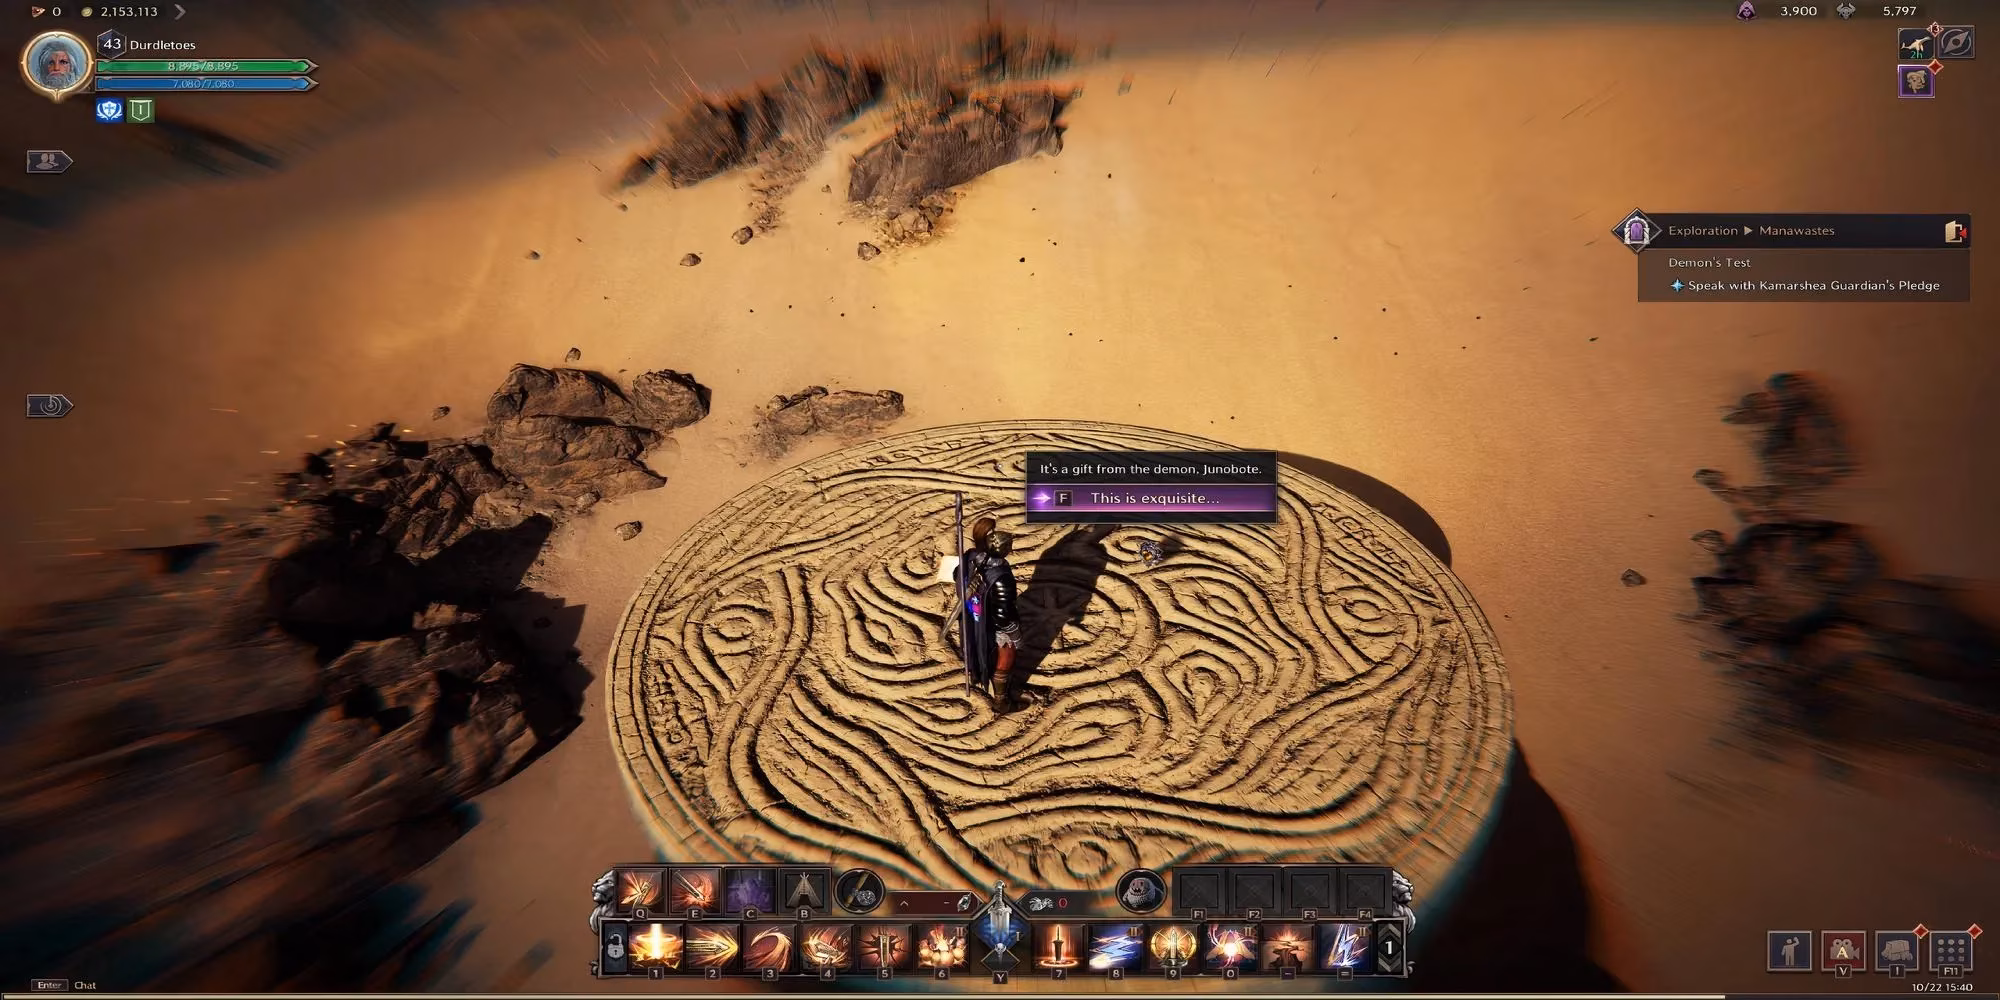
🏆 Claiming the Reward
The last step is a peaceful denouement. Players are transported to the top of the now-synchronized golems. Following the path created by their solved puzzle, they find a final interactive item. A brief concluding dialogue with Junobote plays out, after which the adjacent reward can be claimed. The player is then returned to the main world, the Demon's Test completed. This quest serves as a brilliant example of Throne and Liberty's design depth in 2026, proving that the greatest treasures are sometimes earned not with a sword, but with a sharp mind. The satisfaction of solving Junobote's layered trials is its own unique reward, a trophy of intellect in a world of strength.
Comments